Table of Contents
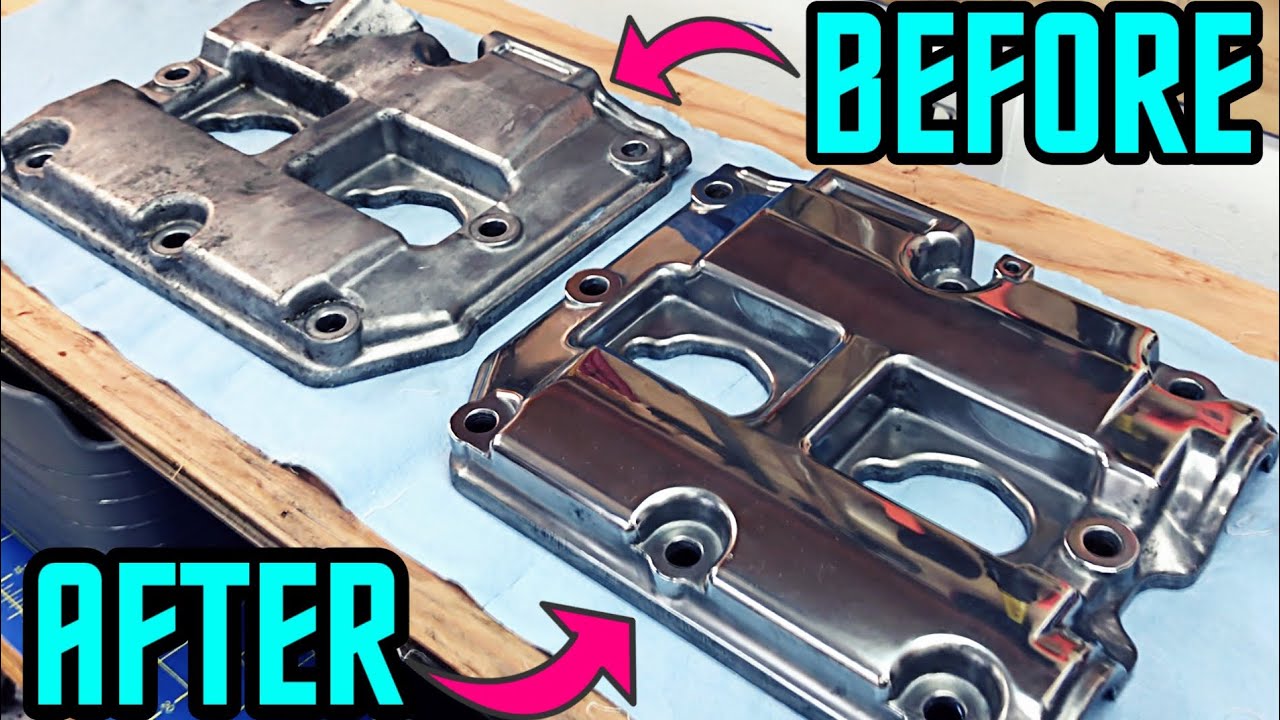
🔧 Why Polish Your Valve Cover?
- Aesthetic Upgrade: Turn a dull, greasy cover into a showroom-worthy centerpiece.
- Corrosion Protection: Remove oxidation and prevent future rust.
- Resale Value Boost: A clean engine bay signals meticulous maintenance.
🛠 Tools & Materials
| Icon | Item | Purpose |
|---|---|---|
| 🎨 | Sandpaper (600, 1000, 1500, 2000 grit) | Smooth and refine the metal surface. |
| 💧 | Water & Bowl | Lubricate for wet sanding. |
| 🔌 | Electric Sander (Optional) | Speed up initial sanding. |
| ✨ | Metal Polish (NeverDull, Mothers) | Achieve a mirror finish. |
| 🧤 | Nitrile Gloves | Protect hands from sharp edges and chemicals. |
Cost: 20–20–40 | Time: 3–5 hours
⚠️ Safety First
- Wear gloves and eye protection.
- Remove the valve cover if possible (prevents back strain and ensures thorough polishing).
📋 Step-by-Step Guide
1. Prep the Valve Cover
- Remove the cover: Disconnect hoses/bolts and clean it with degreaser.
- Start with 600-grit sandpaper: Use an electric sander or sanding block to strip old paint/rust.
- Pro Tip: Sand in one direction to avoid swirl marks.
2. Wet Sanding for Smoothness
- Cut sandpaper (1000/1500/2000 grit) into 2″ squares and soak in water for 10 minutes.
- Wet-sand in circular motions:
- 1000 grit: Remove 600-grit scratches.
- 1500 grit: Refine the surface.
- 2000 grit: Prepare for polishing.
- Rinse frequently to clear debris and check progress.
3. Polish to Perfection
- Apply metal polish with a microfiber cloth, using firm, circular motions.
- Pro Tip: For intricate designs, use a Dremel with a polishing wheel.
4. Reinstall the Valve Cover
- Clean the gasket surface to ensure a proper seal.
- Torque bolts to manufacturer specs (avoid over-tightening).
🌟 Pro Tips for Flawless Results
- Work in a dust-free area to avoid particles embedding in the finish.
- Seal with clear coat (high-temp spray) for long-lasting shine.
- Upgrade hardware: Replace old bolts with stainless steel or anodized options.
🚨 Common Mistakes to Avoid
| Issue | Solution |
|---|---|
| Deep Scratches | Start with coarser grit (400) before 600. |
| Hazy Finish | Re-polish with finer compound (e.g., 3000 grit). |
| Oil Leaks | Replace the valve cover gasket after polishing. |
❓ FAQ
Q: Can I polish aluminum valve covers?
A: Yes! Use non-abrasive polish (e.g., Autosol) to avoid clouding.
Q: How long does the shine last?
A: 6–12 months without sealing. Clear coat extends it to 2+ years.
Q: Can I polish without removing the cover?
A: Not recommended—dust and debris can harm engine components.
✅ Final Touch
Snap a before-and-after photo and tag #EngineBayGlam to inspire fellow gearheads!
(Need product recommendations? Comment below!) 🚗💨
Expand Your Automotive Knowledge 📝
Explore 500+ Free Expert-Curated Guides
🚗 Learn New Skills
From basic maintenance to advanced repairs — clear, actionable tutorials for every skill level.
🌍 Access Anywhere
Mobile-friendly guides with HD visuals. No downloads required.
- Guides & Tutorials
- Car Maintenance 101
- Diagnostics & Troubleshooting
- Seasonal Maintenance
- Budget-Friendly Repairs
- Electrical Systems Guide
- Car Safety & Reliability
- Tools & Product Reviews
- Routine Maintenance
- Car Modifications & Upgrades
- Buying/Selling Guides
- Eco-Friendly Car Care
- Advanced Repairs
- Car Laws & Compliance
- Emergency Repairs
- Future Car Tech