Table of Contents
Upgrade Your Ride’s Sound System—No Experience Required!
1. Why Install Your Own Car Stereo? 💸
Professional installations cost 100–500, but DIY lets you:
- Save 60–80%: Basic stereos start at $50.
- Customize Sound: Choose features like Bluetooth, Apple CarPlay, or subwoofer outputs.
- Learn Valuable Skills: Master wiring basics in under 2 hours.
Key Stat: 70% of car stereo issues stem from wiring errors—avoidable with this guide (NHTSA).
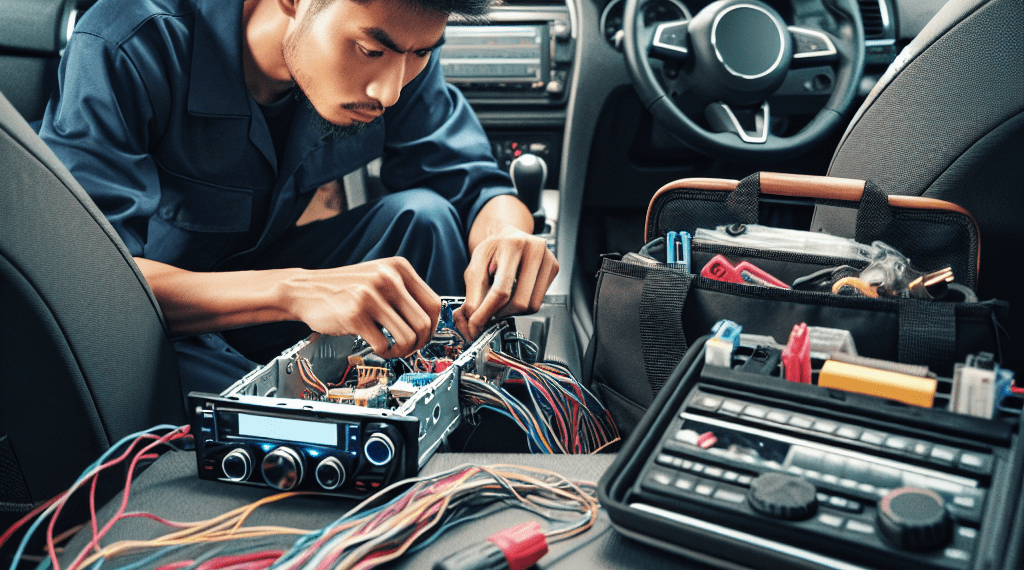
2. Tools & Materials You’ll Need 🧰
| Item | Purpose | Cost |
|---|---|---|
| Wire strippers/crimpers | Strip insulation, secure connections | $15 |
| Screwdrivers (Phillips/flathead) | Remove trim panels | $10 |
| Wiring harness adapter | Match factory wires to new stereo | $15 |
| Dash kit | Fit stereo into your car’s dashboard | $20 |
| Multimeter | Test connections (optional) | $20 |
| Electrical tape | Insulate wires | $5 |
| Trim removal tools | Pry panels without damage | $10 |
Pro Tip: Buy a vehicle-specific wiring harness—no cutting factory wires!
3. Safety Tips Before You Start ⚠️
- Disconnect the battery (negative terminal) to prevent shocks/shorts.
- Label wires with tape to avoid confusion.
- Work in a well-lit area to see small connectors.
4. Step-by-Step Wiring Guide 📋
Step 1: Remove the Old Stereo
- Pry off trim panels around the stereo using a trim tool.
- Unscrew the old stereo (usually 4–6 bolts).
- Unplug wiring harness and antenna—gently!
Step 2: Connect the Wiring Harness
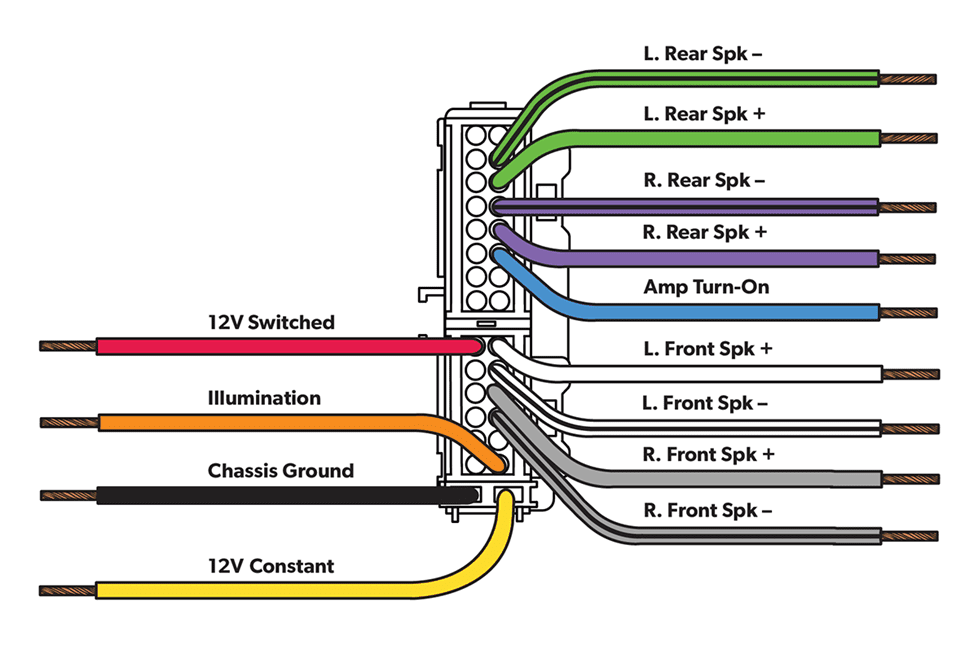
- Match wire colors between the harness and new stereo:
- Red: 12V ignition power
- Yellow: 12V constant power (memory)
- Black: Ground
- White/White-Black: Front left speaker +/-
- Gray/Gray-Black: Front right speaker +/-
- Green/Green-Black: Rear left speaker +/-
- Purple/Purple-Black: Rear right speaker +/-
- Twist wires together and secure with crimp connectors or solder.
- Wrap connections in electrical tape.
Step 3: Mount the New Stereo
- Attach the stereo to the dash kit using included brackets.
- Plug in the wiring harness and antenna to the new stereo.
- Slide the stereo into the dash and secure with screws.
Step 4: Test and Reassemble
- Reconnect the battery and turn on the stereo.
- Check all functions: Radio, Bluetooth, aux input.
- Reattach trim panels and ensure no wires are pinched.
5. Top 5 Budget-Friendly Stereos 🛒
| Brand/Model | Features | Price |
|---|---|---|
| BOSS Audio BVCP9685A | CarPlay, Android Auto, 7″ touchscreen | $250 |
| Pioneer MVH-S322BT | Bluetooth, USB, basic controls | $80 |
| JVC KD-T710BTS | Detachable face, 13-band EQ | $100 |
| Sony DSX-GS80 | High-power output, customizable sound | $150 |
| Dual XDCPA11BT | Wireless charging, Alexa built-in | $200 |
6. 7 Costly Mistakes to Avoid ❌
- Skipping the Harness Adapter: Cutting factory wires voids warranties.
- Ignoring Grounding: Poor ground = static/no sound.
- Mixing Speaker Wires: Reversing +/- causes phase issues.
- Overlooking Fuse Ratings: Check stereo manual for amp requirements.
- Forgetting Antenna Adapters: Needed for AM/FM reception.
- Rushing Connections: Loose wires lead to intermittent sound.
- Using Cheap Connectors: They corrode or break over time.
7. FAQs ❓🌟
Q1: What if my car has steering wheel controls?
A: Buy a PAC RP4.2-CH11 adapter ($60) to retain them.
Q2: Can I install a stereo without a dash kit?
A: No—kits fill gaps and prevent rattling.
Q3: Why is my stereo not turning on?
A: Check the yellow/red wires for power with a multimeter.
Q4: How do I hide wires?
A: Use zip ties and tuck them behind the dash.
Q5: Can I add a subwoofer later?
A: Yes! Choose a stereo with RCA preamp outputs.
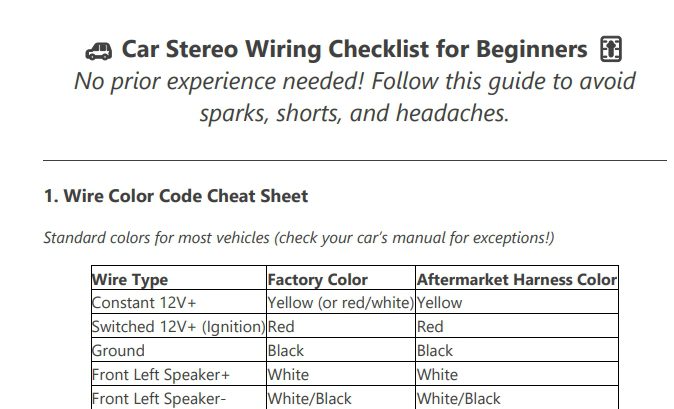
8. Free Wiring Checklist 📝
[🔗 Download Your Free PDF Here]
Includes:
- Wire color code cheat sheet.
- Tool checklist.
- Step-by-step troubleshooting.
Final Pro Tips 🌟
- Take Photos During Disassembly: Helps with reassembly.
- Use Heat-Shrink Tubing: Durable alternative to electrical tape.
- Test Before Final Mounting: Avoid reinstalling a faulty unit.
🚗 Share this guide to help friends crank up the beats without breaking the bank! 🚗
Expand Your Automotive Knowledge 📝
Explore 500+ Free Expert-Curated Guides
🚗 Learn New Skills
From basic maintenance to advanced repairs — clear, actionable tutorials for every skill level.
🌍 Access Anywhere
Mobile-friendly guides with HD visuals. No downloads required.
- Guides & Tutorials
- Car Maintenance 101
- Diagnostics & Troubleshooting
- Seasonal Maintenance
- Budget-Friendly Repairs
- Electrical Systems Guide
- Car Safety & Reliability
- Tools & Product Reviews
- Routine Maintenance
- Car Modifications & Upgrades
- Buying/Selling Guides
- Eco-Friendly Car Care
- Advanced Repairs
- Car Laws & Compliance
- Emergency Repairs
- Future Car Tech

